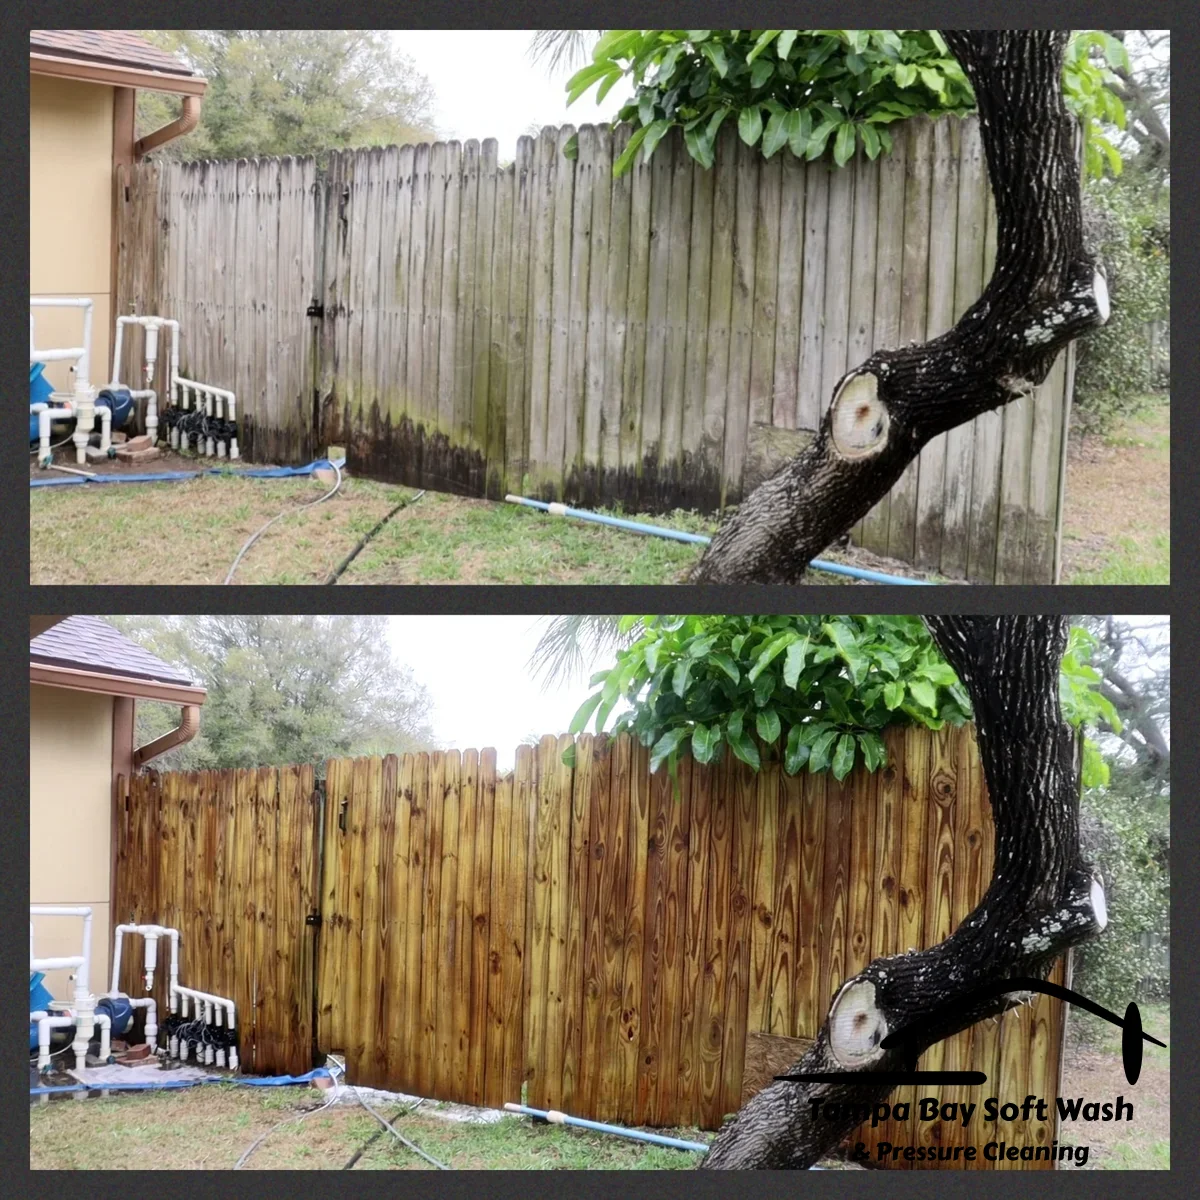
Weathered wood can make your decks, fences, and siding look dilapidated and beyond repair. We will teach you the exact step-by-step process used to safely clean and restore aged wood. When you're ready for professional results without the hassle, Tampa Bay Soft Wash in Clearwater, FL is equipped to handle all your exterior wood restoration needs.
The Steps To Restoring Weathered Wood
First, we want to list the steps or standard operating procedure that we use and then we will go into a bit more detail down below. A lot of guys that teach us on the internet tend to use words that can have multiple meanings and that can be very vague. Sometimes unintended, other times they are intentionally being vague as to not give away any of their “trade secrets”. Hopefully we can clear some of that up in this blog.
saturate the wood with water
apply wood cleaner or wood stripper
thoroughly rinse
apply wood brightener
final rinse
let fully dry before applying any wood stain or sealer
Choosing A Wood Cleaner
This is where most people start to get confused. You start to wonder what should you use as your wood cleaner? We prefer to make all of our own cleaning products from raw chemicals. Instead of using a store bought wood cleaner, we make our own depending on the circumstances.
When researching this topic you may have read to never use “bleach” on wood. We respectfully disagree. When used properly, sodium hypochlorite can be very effective at cleaning wood! Let me share what wood cleaners and strippers we consider using.
| Chemicals | Known As | Used For | Ratio | Surfactant | Dwell Time | Notes |
|---|---|---|---|---|---|---|
| sodium percarbonate | Oxi-Clean, Ajax Oxygen Bleach | wood cleaning | 4 oz. – 8 oz. per gallon | .5 oz. – 2 oz. | 10-20 min. | safest but least aggressive option |
| sodium hypochlorite | bleach, chlorine | wood cleaning | 1% – 5% | .5 oz. – 2 oz. | 10-20 min. | cheapest with great results |
| sodium metasilicate | “phosphate-free” TSP powder | wood cleaning (light stripper) | 4 oz. – 8 oz. per gallon | .5 oz. – 2 oz. | 10-20 min. | odd man out but great at cleaning and decent at stripping |
| sodium hydroxide | caustic soda/lye | wood cleaning (heavy wood stripper) | 4 oz. – 8 oz. per gallon | 1 oz. – 3 oz. | 30 min. | most agressive option for stripping |
| sodium hypochlorite and sodium hydroxide | tbsoftwash wood prep. | wood cleaning (heavy wood stripper) | 2 oz. – 8 oz. of Sodium hydroxide per 1%-5% gallon of sodium hypochlorite. | 1 oz. – 3 oz. | 30 min. | great stripper and cleaner |
Don’t take this chart as gospel. You can go weaker or stronger with every chemical. If you are just starting out and still learning, just start light and work your way towards the desired results. If you hit something with that “hot sauce” you may end up not being able to correct that mistake. Just remember, chemicals take time to work and aren’t cheap. It also isn’t cheap to repair a deck…
Pre-Wetting The Weathered Wood
The first step of the process is to saturate the wood that you are trying to clean. This serves a few purposes.
First, wood is an absorbent surface. Pre-wetting it prevents your cleaner from being absorbed to quickly and leaving behind spotting or blotches. Allowing the cleaner to evenly spread across and the surface and into the wood.
Secondly, it allows the wood cleaner to penetrate deeper into the wood membrane through osmosis giving the wood a much deeper clean. If you spray cleaner directly onto the wood, it will only penetrate so deep before it dries, preventing the desired “deep clean”. Most guys will tell you that pre-wetting will prevent the cleaner from soaking into the wood. It is actually the exact opposite, it helps it soak even deeper!
Apply Wood Cleaner To Begin Restoring
Apply with a pump sprayer or a chemical pump, such as a soft wash system. If you use a pump sprayer, just make sure to apply a nice even coat. If you are using a chemical pump or a soft wash system, don’t go crazy by allowing massive runoff. Nice even coats.
Each chemical should be left to dwell for 10 – 30 minutes. The longer it dwells, the more likelihood of “furring”. The most important part about this part of the process is to not let the wood cleaner dry. Before it dries, either apply more cleaning solution or use water to keep the wood wet. Just remember to not get to far ahead of yourself. Cooler days with some overcast are great for cleaning wood.
Thoroughly Rinse…
After your cleaner has dwelled, it is time to thoroughly rinse. You can get away with using a garden hose or a soft wash pump but you really want to massage the wood fibers during each of the rinsing steps. I suggest using a pressure washer that is equipped with a soft wash nozzle or soap tip.
You don’t need a strong pressure washer, but you do want at least a few hundred PSI by the time it hits the wood. You can obviously use regular pressure washer tips, but you run the chance of damaging the wood. I would recommend a 40-degree tip at most if I am using a normal tip on a 2,000 or 3,000 PSI pressure washer. With a soft wash nozzle or a soap tip, you have almost no chance of damaging the wood. When rinsing, always go with the grain. Rinse, rinse, then rinse some more…
An example of rinsing off wood cleaner. I am using a soft wash tip with an 8 GPM pressure washer.
Applying Wood Brightener
| Chemical | Surfactant | Dwell Time | Notes |
|---|---|---|---|
| vinegar | .5 oz. – 2 oz. | 10 – 20 min. | cheap, and safe option, but not the best |
| citric acid | .5 oz. – 2 oz. | 10 – 20 min. | safe option, but not the best |
| oxalic acid | .5 oz. – 2 oz. | 10 – 20 min. | best option, but not the safest or cheapest |
You obviously do not have to wait for the fence to dry before you start to apply your brightener. If it does dry, pre-wet it again. Some guys will completely skip applying a brightener. However, I suggest applying a brightener for that wow factor. It really makes the grains of the wood pop out. If you plan on staining the fence a darker color, you might want to skip this step, don’t take this chart or blog as gospel, you will have to adjust depending on the situation.
The major perk of using oxalic acid for brightening the wood is that it removes rust stains. Over time, rain will cause the hardware to rust and leaves behind rust stains.
Rinse, Rinse, Then Rinse Some More…Done
You know the drill, make sure you completely rinse off the wood brightener. Once you do that, rinse it some more…You are done! Just make sure the fence is completely dry before applying any stain or sealer. If the cells of the wood are filled with water, it will not allow the stain and sealant to penetrate properly.
🎓 Go Deeper: SOPs by Surface Type
Master the Wood Restoration SOP — sodium percarbonate, brighteners, and sealing — in our free Academy course.
Start Learning → academy.tbsoftwash.com👍 Did this guide help you?
Give us a like on Facebook and follow @tbsoftwash on Instagram, YouTube, TikTok, and Twitter for more professional cleaning tips!
📍 For expert soft washing & pressure cleaning in Tampa Bay, visit tbsoftwash.com or contact us for a free estimate!